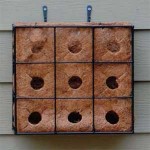
Standard nursery plants (2.5″ to 4.5″ roots)fit through the flexible homes.
Stand the living wall planter on a table because you will be planting from the top.
STEP 1: Wet the root balls of the plants, squeeze them and slide them through the bottom row of holes. Add potting mix.
STEP 2: Repeat the same process until you have finished planting the holes. Plant one layer at a time, like lasagna!
STEP 3:
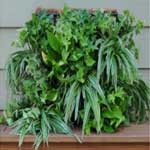
Tuck in the edge plants along the top. Be sure to leave about 3/4″ space between the top of the potting mix and the top edge of the planter. Hang with the enclosed hangers.